Customize your blog to become more better than usual by adding Image Slider. The slider can make your blog trendy and stylish. This Image Slider also can make the visitors who come to your blog feel very attractive as it is one of the famous fashion for the blogger(blog). I bet you all will like this things after you make your own Image Slider after you follow the steps below.
.stepcarousel{ position: relative; /*leave this value alone*/ overflow: scroll; /*leave this value alone*/ width: 554px; /*Width of Carousel Viewer itself*/ height: 160px; /*Height should enough to fit largest content's height*/ margin: 0px 48px 5px 48px;
}
.stepcarousel .belt{ position: absolute; /*leave this value alone*/ left: 0; top: 0; }
.stepcarousel .panel{ float: left; /*leave this value alone*/ overflow: hidden; /*clip content that go outside dimensions of holding panel DIV*/ margin: 20px 10px ; /*margin around each panel*/ width:170px; /*Width of each panel holding each content. If removed, widths should be individually defined on each content DIV then. */ background:#0e1829; height:120px; border:1px solid #1d2c44;
} .stepcarousel .panel p{ text-align: left; /*leave this value alone*/ overflow: hidden; /*clip content that go outside dimensions of holding panel DIV*/ margin: 5px 5px ; /*margin around each panel*/
}
.stepcarousel .panel h2{ text-align: left; /*leave this value alone*/ height:20px; overflow: hidden; /*clip content that go outside dimensions of holding panel DIV*/ margin: 2px 5px ; /*margin around each panel*/ font-size:16px; font-weight:bold; text-align:center; font-family:Georgia,century gothic,Arial,verdana, sans-serif; }
.stepcarousel .panel img{ float: left; /*leave this value alone*/ background:#0E1829; /*clip content that go outside dimensions of holding panel DIV*/ margin: 5px 5px 5px 5px; /*margin around each panel*/ padding:0px 0px; }
5. Then, click Add a gadget at the Page Elements and choose HTML/JavaScript
.stepcarousel{ position: relative; /*leave this value alone*/ overflow: scroll; /*leave this value alone*/ width: 554px; /*Width of Carousel Viewer itself*/ height: 160px; /*Height should enough to fit largest content's height*/ margin: 0px 48px 5px 48px;
}
.stepcarousel .belt{ position: absolute; /*leave this value alone*/ left: 0; top: 0; }
.stepcarousel .panel{ float: left; /*leave this value alone*/ overflow: hidden; /*clip content that go outside dimensions of holding panel DIV*/ margin: 20px 10px ; /*margin around each panel*/ width:170px; /*Width of each panel holding each content. If removed, widths should be individually defined on each content DIV then. */ background:#0e1829; height:120px; border:1px solid #1d2c44;
} .stepcarousel .panel p{ text-align: left; /*leave this value alone*/ overflow: hidden; /*clip content that go outside dimensions of holding panel DIV*/ margin: 5px 5px ; /*margin around each panel*/
}
.stepcarousel .panel h2{ text-align: left; /*leave this value alone*/ height:20px; overflow: hidden; /*clip content that go outside dimensions of holding panel DIV*/ margin: 2px 5px ; /*margin around each panel*/ font-size:16px; font-weight:bold; text-align:center; font-family:Georgia,century gothic,Arial,verdana, sans-serif; }
.stepcarousel .panel img{ float: left; /*leave this value alone*/ background:#0E1829; /*clip content that go outside dimensions of holding panel DIV*/ margin: 5px 5px 5px 5px; /*margin around each panel*/ padding:0px 0px; }
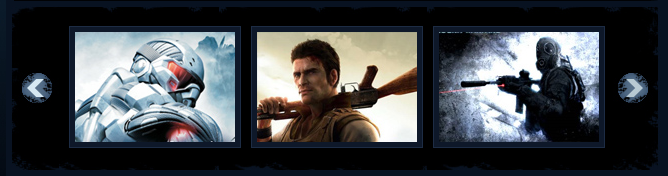
Change the links, images url, the titles with yours...
Links = Red colour
Image url = Yellow colour
Titles = Blue colour
You just keep on adding links to in this format to any number you want as you can add thousand of images and posts in this format, no limit to it.